The Stallion Responsive Theme includes two built in header areas, these can be turned on/off independently of each other meaning you can have a WordPress blog with.
Header area 1 (Stallion 2011 Header Area)
Header area 2 (Alternative Stallion Header Area)
2 header entire areas (looks rubbish)
Combination of the two (half of one, half of the other).
No header areas
This gives the Stallion Responsive theme users full control over how their WordPress blogs header area behaves and it’s all controlled by a few clicks of the mouse.
Stallion Theme Header Areas
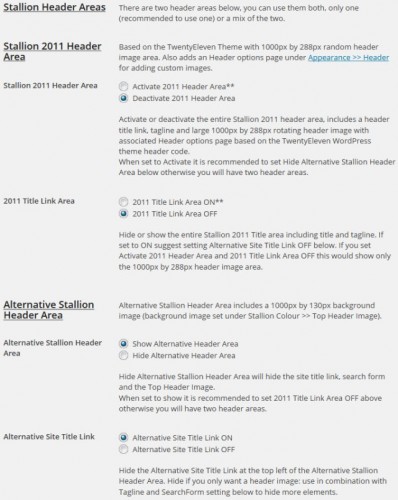
Under “Stallion Theme” >> “Layout Options” : “Stallion Header Areas” you will find the following options that turn the header areas on/off:
Each of the two WordPress header areas “Stallion 2011 Header Area” and the “Alternative Stallion Header Area” are broken into two parts, the actual header area (the rectangle block that’s the WordPress header area: turned on/off using the Title Link Area options) and whether there should be a header image (options on the “Stallion Theme” >> “Colour Options” page, see later).
Each Header area has it’s own header images (different sizes) and which one you use (or combination) determines which size images to use and how to get them online (there’s hundreds of free images built into the free Stallion Responsive Child theme).
Stallion 2011 Header Area
The Stallion 2011 Header Area is based on the TwentyEleven WP Theme (TwentyEleven used to be the default WordPress theme) header images area and uses a 1000px by 288px header image with the option to have random images, upload your own images and crop them (options under “Appearance” >> “Header”), set different size images (best to keep them 1000 px wide, but the height can be changed).
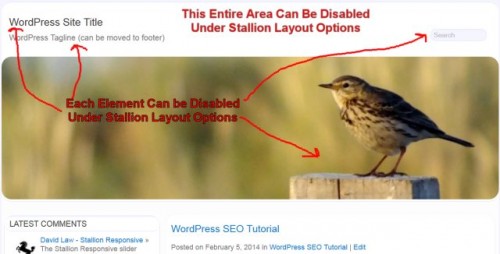
With the Stallion 2011 Header Area the header images are loaded below the main header area that loads at the top of the page: see screenshot.
As you can see from the image above everything within the WordPress header area can be disabled, you can have the top header part without the image below, with or without the site title, tagline and search form: you can have the entire header area (as seen in the image) through to nothing at all.
Not shown in the first options screenshot there are further Stallion layout options for the tagline and search form under “Stallion Theme” >> “Layout Options”. Stallion is modular, a lot of elements most themes/plugins don’t touch can be turned on/off at the click of a mouse.
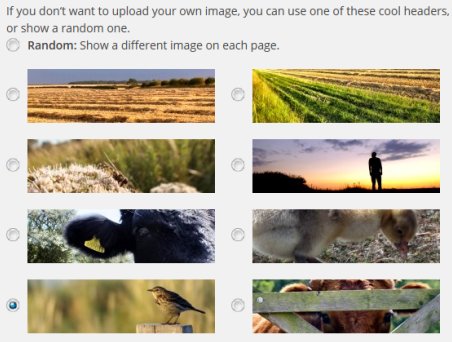
To disable (or turn on if it’s not showing) the actual header image go to “Appearance” >> “Header” where you will find header image options, click the image below for a full screenshot.
If you don’t want a header image click the “Remove Header Image” button.
If it’s already removed and you want an image to show either tick the “Random: Show a different image on each page.” tick box, one of the 8 default Stallion header images tick boxes or upload an image via the “Browse” button or the “Choose Image” button.
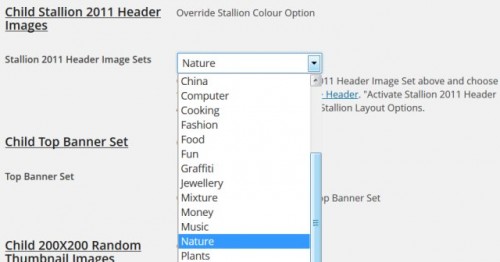
Stallion Responsive (the main parent theme) has one built in 2011 header image set (called Business: each set has 8 images), it can be changed to a custom set (you have to upload the header image sets using FTP: see later) at “Stallion Theme” >> “Colour Options” : “Stallion 2011 Header Image Sets”.
If you install the free Stallion Responsive Child theme you’ll find under “Stallion Theme” >> “Child Theme Options” : “Stallion 2011 Header Image Sets” a further twenty 2011 WP header image sets, 20 sets of 8 images, so 160 WordPress header images (install the child theme, it’s free :-))
Click the image below to see all the Stallion Responsive 2011 Header Images as of June 2014 (all free, part of the WordPress child theme).
Add Custom Header Images
If you use the “Stallion 2011 Header Area” there’s 10 custom header image sets, all sets are jpg only and are comprised of 8 images. As described above each set comprises of 8 images, to create a custom set the minimum images are 8 images with dimensions 1,000px by 288px and filenames.
image-01.jpg
image-02.jpg
image-03.jpg
image-04.jpg
image-05.jpg
image-06.jpg
image-07.jpg
image-08.jpg
The above would be ONE custom header image set, there’s a corresponding option under “Stallion Theme” >> “Colour Options” : “Stallion 2011 Header Image Sets” for each of the 10 sets “Custom 01”, “Custom 02” etc…
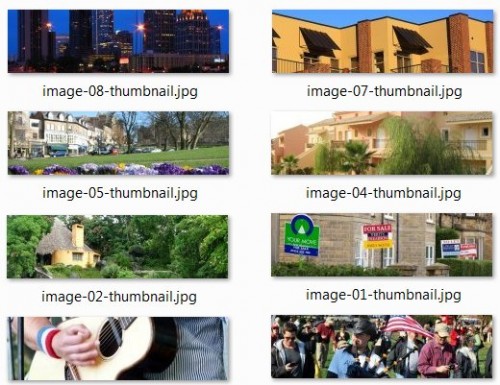
If you want to see a thumbnail version of your custom images when viewing “Appearance” >> “Header” make a copy of your 8 images, resize to 230px by 66px and rename to:
image-01-thumbnail.jpg
image-02-thumbnail.jpg
image-03-thumbnail.jpg
image-04-thumbnail.jpg
image-05-thumbnail.jpg
image-06-thumbnail.jpg
image-07-thumbnail.jpg
image-08-thumbnail.jpg
You only see these thumbnail images when viewing “Appearance” >> “Header”, so they aren’t essential to creating a custom set.
If you’ve installed the Stallion Responsive Child Theme upload them using an FTP program like Filezilla to
/wp-content/themes/stallion-responsive-child/headers/custom-01/
Or if no child theme to:
/wp-content/themes/stallion-responsive/headers/custom-01/
It’s best to add it to the child theme (install the child theme), when you update Stallion Responsive using the automated update option (under “Dashboard” >> “Updates”) everything under “/wp-content/themes/stallion-responsive/” is deleted (that’s how WordPress updates themes, deletes the old files including your /custom-01/ folder and it’s custom images), but everything under “/wp-content/themes/stallion-responsive-child/” remains intact (nothing deleted from the child theme during an update so your /custom-01/ folder won’t be deleted).
If you have the Child theme active go to “Stallion Theme” >> “Child Theme Options” and set “Stallion 2011 Header Image Sets” to “Use Original Options” (this is very important).
Under “Stallion Theme” >> “Colour Options” set “Stallion 2011 Header Image Sets” to “Custom 01” if you added your set to /custom-01/.
For the set to work you also should have the following set as well.
Under “Stallion Theme” >> “Layout Options” Set “Activate 2011 Header Area”
The last setting is related to which of the header areas (Stallion Responsive has two header areas see earlier) you want to use.
If the set isn’t showing go to “Appearance” >> “Header” and check the options there.
Alternative Stallion Header Area
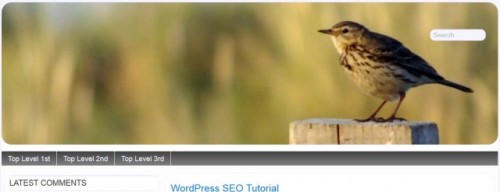
The Alternative Stallion Header Area is slightly different, the header image (1000px by 130px) loads behind the top header area (as a background image) rather than under it (as a standard clickable image link), you can still disable the site title, tagline etc… so it can range from a clean header area with site title etc…(no header image) through to just an image and everything in between) or again nothing at all.
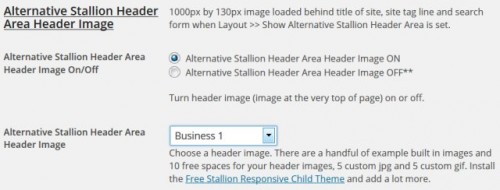
To turn the alternative header image on/off go to “Stallion Theme” >> “Colour Options” : “Alternative Stallion Header Area Header Image On/Off”.
Here you can also set which alternative header image to use, this setting is overwrote by the same named option “Alternative Stallion Header Area Header Image” on the child options page under “Stallion Theme” >> “Child Theme Options”.
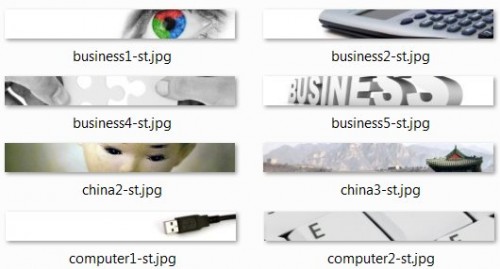
Stallion Responsive (the main parent theme) has 7 alternative header images, the child theme has around 90 (install the child theme, it’s free :-)) Click the image below to see all the Stallion Responsive Alternative Header Images as of June 2014 (all free, part of the WordPress child theme).
The Alternative Stallion Header Area has less options/features (can’t upload custom header images within WordPress, have to use FTP), but is slightly more SEO friendly (the WordPress nav menu is loaded differently: the nav menu code is loaded within the footer, an SEO feature).
The image size is fixed at 1000px by 130px and if you want to add your own images requires using FTP (Filezilla for example).
Add Custom Header Images
If you use the “Alternative Stallion Header Area” there’s 10 custom header image slots, 5 are jpg 5 are gif. You have to create these images (hence they are custom).
Filenames for the custom images are
c1.jpg
c2.jpg
c3.jpg
c4.jpg
c5.jpg
c1.gif
c2.gif
c3.gif
c4.gif
c5.gif
There’s a corresponding option under “Stallion Theme” >> “Colour Options” : “Alternative Stallion Header Area Header Image” for each of the above.
“Custom 1 JPG”, “Custom 2 JPG” etc…
If you’ve installed the Stallion Responsive Child theme upload them using an FTP program like Filezilla to
/wp-content/themes/stallion-responsive-child/headers/
Or if no child theme to:
/wp-content/themes/stallion-responsive/headers/
It’s best to add it to the child theme (install the child theme), when you update Stallion Responsive using the automated update option (under “Dashboard” >> “Updates”) everything under “/wp-content/themes/stallion-responsive/” is deleted (that’s how WordPress updates themes, deletes the old files including your c1.jpg file and uploads new), but everything under “/wp-content/themes/stallion-responsive-child/” remains intact (nothing deleted from the child theme during an update so your c1.jpg file won’t be deleted).
You can see my c1.jpg file (I use this feature on this site) is loaded at
https://stallion-theme.co.uk/wp-content/themes/stallion-responsive-child/headers/c1.jpg
You can check if yours is in the right location by using the URL above and change my domain name with yours, when c1.jpg is in the right directory you’ll see it using the URL format above.
If you have the Child theme active go to “Stallion Theme” >> “Child Theme Options” and set “Alternative Stallion Header Area Header Image” to “Use Original Options” (this is very important).
Under “Stallion Theme” >> “Colour Options” set “Alternative Stallion Header Area Header Image” to “Custom 1 JPG” if your file is c1.jpg.
For the c1.jpg to work you also should have the following set as well.
Under “Stallion Theme” >> “Colour Options” Set “Alternative Stallion Header Area Header Image ON”
The above turns the image feature ON.
Under “Stallion Theme” >> “Layout Options” Set “Show Alternative Header Area**”
The last setting is related to which of the header areas (Stallion Responsive has two header areas see earlier) you want to use. The alternative one (which I use on this website with a c1.jpg) is for the 1000px x 130px header images that are used as a background behind the name of the site, tagline and search form.
WordPress Custom Header Layouts
As mentioned above you can use both header areas at the same time, I see this with some Stallion Theme users (basically clicking everything on without understanding what the features do) this is not advised, it looks rubbish and not exactly ideal SEO wise.
A more interesting arrangement is a combination of the two headers, by having the following settings under “Stallion Theme” >> “Layout Options”:
Activate 2011 Header Area**
2011 Title Link Area OFF
Show Alternative Header Area
Alternative Site Title Link ON
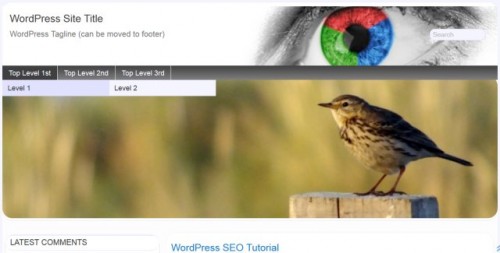
Both header areas are on, but the 2011 Title Link Area is OFF.
I’ve also activated the WordPress navigation menu and hovered over the dropdown menu. In the image above we can see the alternative header image as the background at the top and the 2011 header image as an image link at the bottom. You can still disable the site title, tagline and search form with the above setup.
Build a WordPress Theme LOGO
Another option is to turn three of the four main settings off, leaving just “Activate 2011 Header Area**” on. This option disables the part of the WordPress header loading the site title and tagline and the output looks like this:
I’ve left the search form within the header for the screenshot above, the form be disabled to load just the WordPress header image which is a clickable link back to the sites home page.
Some Stallion Theme users like to build a WordPress header image with the name of their site etc… and use the above setup: basically building a website LOGO image. If you use this setup (no site title link) you loose a H1 header on the home page, this is important SEO wise.
I’ve thought of this, there’s a H1 Replacement widget under “Appearance” >> “Widgets”, drag n drop the “H1 Replacement Widget” to a sidebar area that makes sense and you’ll not loose the SEO benefits of a H1 header on the homepage. You can see a live example of this at my wifes weight loss blog.
David Law




Location of 2011 custom headers uploaded under Appearence
Hi David,
I am using Stallion Responsive (not Child). I added custom 2011 headers with the Appearance upload facility but can’t find the folder where these are located. Can you please help?
Understanding WordPress Image Uploads
Any images added under “Appearance” >> “Header” will be saved in your default uploads folder.
By default WordPress sets the uploads folder to
/wp-content/uploads/
Depending on the settings “Settings” >> “Media” determines exact location, if you’ve ticked
Organize my uploads into month- and year-based folders
Your images are organised by month, so something added this month (November 2014) will be under.
/wp-content/uploads/2014/11/
If you wanted access to thse via FTP you’d access the server with an FTP program and go to /wp-content/uploads/2014/11/
You can also access images directly under your WordPress Dashboard under “Media” >> “Library”.
If you just uploaded an image via “Appearance” >> “Header” it will be the first image shown, it’s organised by newest image first. Here you can delete any images you don’t want anymore.
To use a Stallion 2011 Header Image uploaded via “Appearance” >> “Header” you’ll see it on the options page “Appearance” >> “Header” where it can be ticked to be used etc…
To use with the Stallion 2011 Header Area go to “Stallion Theme” >> “Layout Options” and tick “Activate 2011 Header Area”.
Note: Images uploaded this way only work with the Stallion 2011 Header Area, that’s the header area with the big image below the title of the site. This doesn’t work with the Alternative Stallion Header Area, that’s the header area like I’m using on this site with the image behind the title of the site. If you want a custom image with the alternative header it has to be uploaded via FTP, see main article from the heading “Alternative Stallion Header Area” for instructions.
David
Understanding WordPress Image Uploads